

How To Register Eos Tokens
How To Register Your EOS Tokens
![]()
As the time approaches for the launch of the EOS blockchain, many token holders still have their tokens on exchanges. The best idea to ensure your EOS tokens will be associated with an EOS key pair is to register your tokens with your own keys.
Below we will take you through the proper steps to register your EOS tokens before the June 1st deadline. You will need to add some Ethereum in addition to moving your EOS holdings to your private wallet. The tutorial is for customers who do not know how to register their EOS tokens
Prerequisites
We will walk over the steps of doing it yourself using Binance exchange with MetMask wallet.
1. First install MetaMask wallet
You can follow the instructions on the metamask website
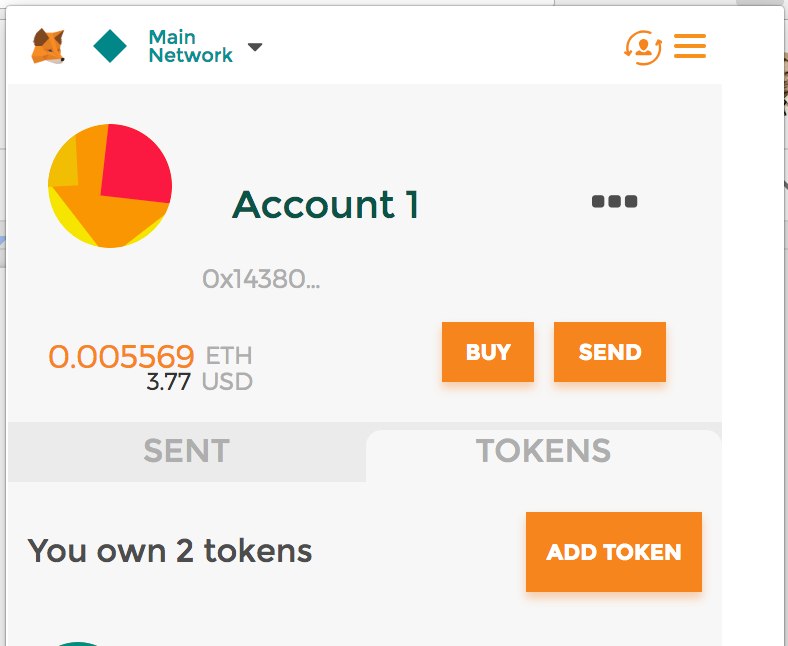
2. Add EOS tokens support to the MetaMask wallet
Click ADD TOKEN button:
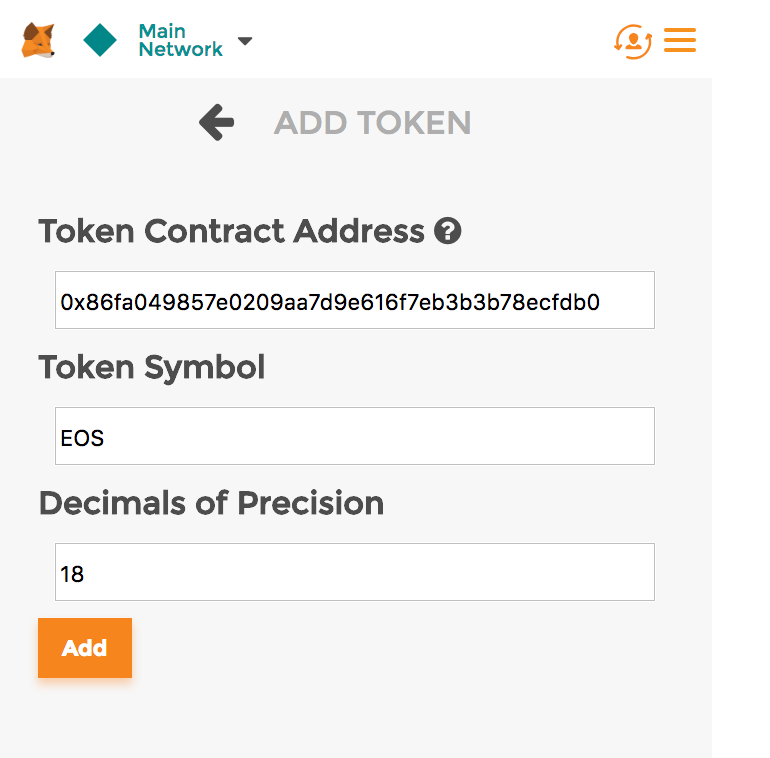
3. Fill the form with the proper information:
- EOS Token Contract Address:0x86fa049857e0209aa7d9e616f7eb3b3b78ecfdb0
- Use EOS for the Token Symbol
- Use 18 for the Decimals of Precision
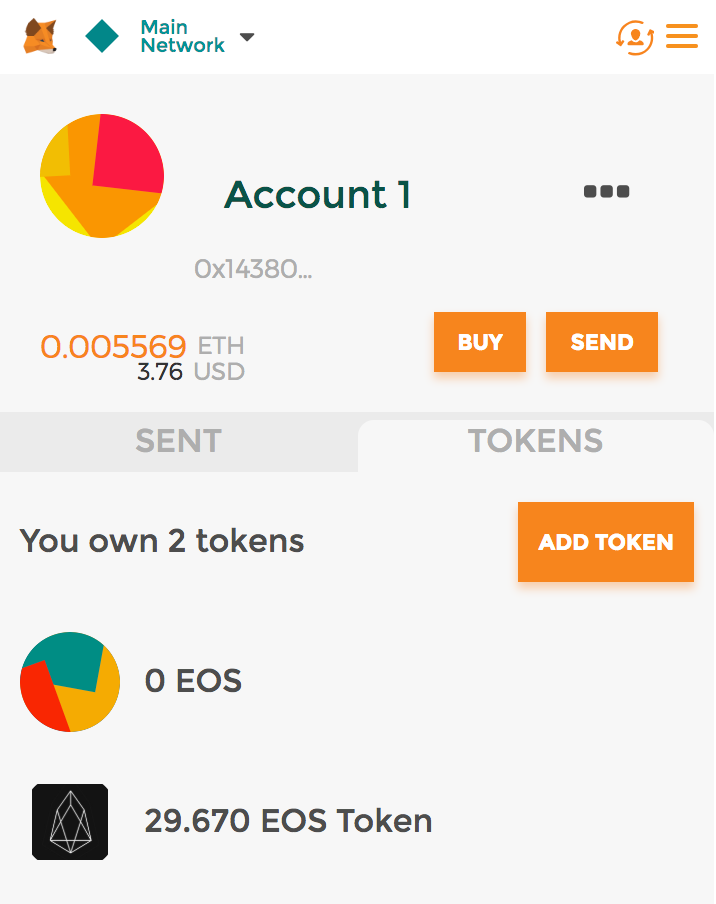
4. You will see EOS tokens under the tokens tab
You will know you got it right if you see EOS black logo right next to the tokens. As you can see on screenshot I got it wrong first time using EOS smart contract address first used for distribution that ends in ccf. As long as you use EOS Holder address I listed in previous step — you will be OK.
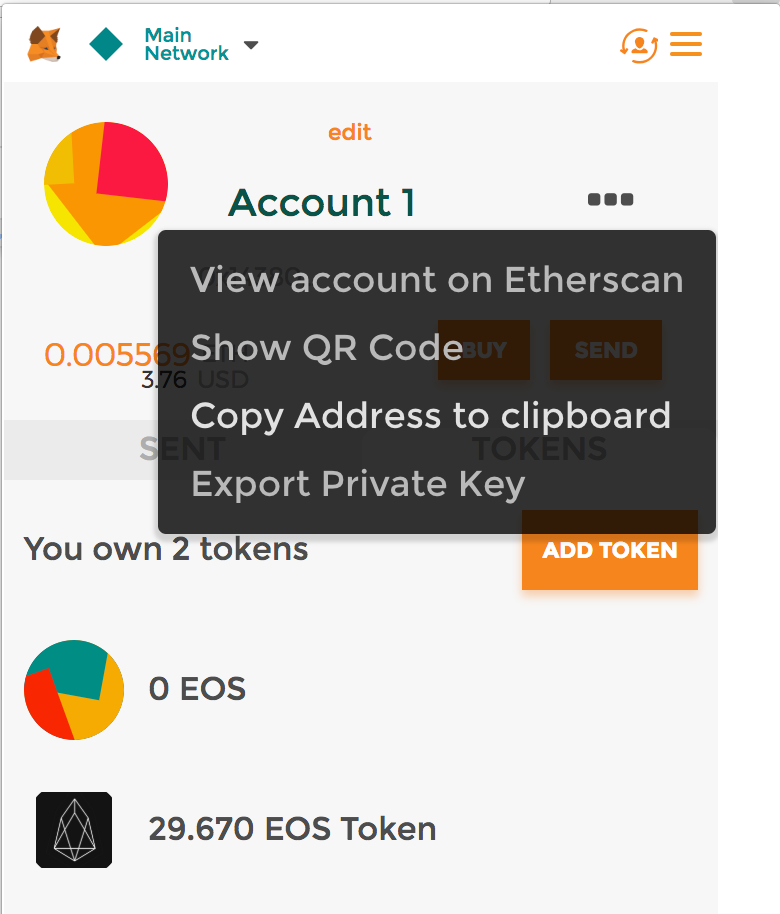
5. Aquire your Ethereum address
Get your Ethereum address from your wallet by right clicking on the button to the right of your account name and copy your address to your clipboard.
6. Withdraw your tokens from the exchange
Withdraw your EOS tokens to your MetaMask Ethereum wallet address. Depending of Ethereum network transaction time and load — you should see those tokens appear in your MetaMask account — like in picture above.
7. Generate a key pair
Next you need to register your EOS tokens by associating your Ethereum address with a new EOS key pair. Hence you need to generate new EOS key pair first.
The easiest way to do this is to use EOSjs web interface:
https://nadejde.github.io/eos-token-sale/
Click "Generate EOS key" button and then save your key pair in secure location. Keep in mind that generation done in your browser and never sent or loaded over the Internet.
<For more technical and security aware folks — you can download the EOS node software, compile, run, and generate your own key pair from the command line. We will not go through that process here but documentation for that process is easy to find.
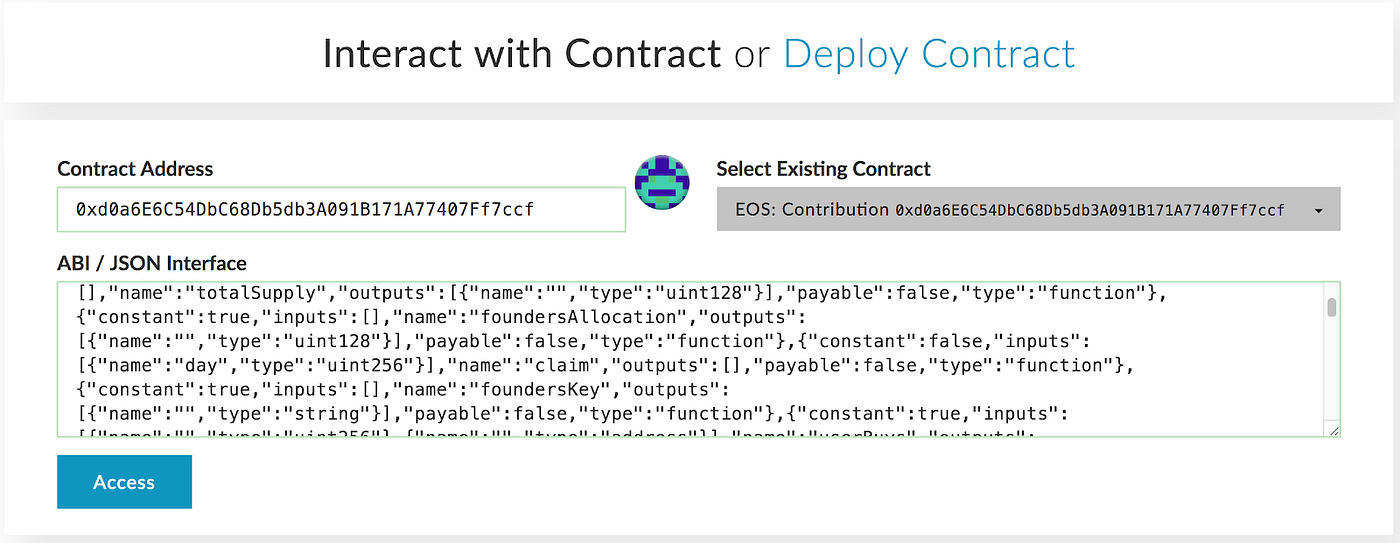
8. Go to MyEtherWallet contracts web interface
MEW Contracts Page
Select EOS Contribution contract and click Access button:
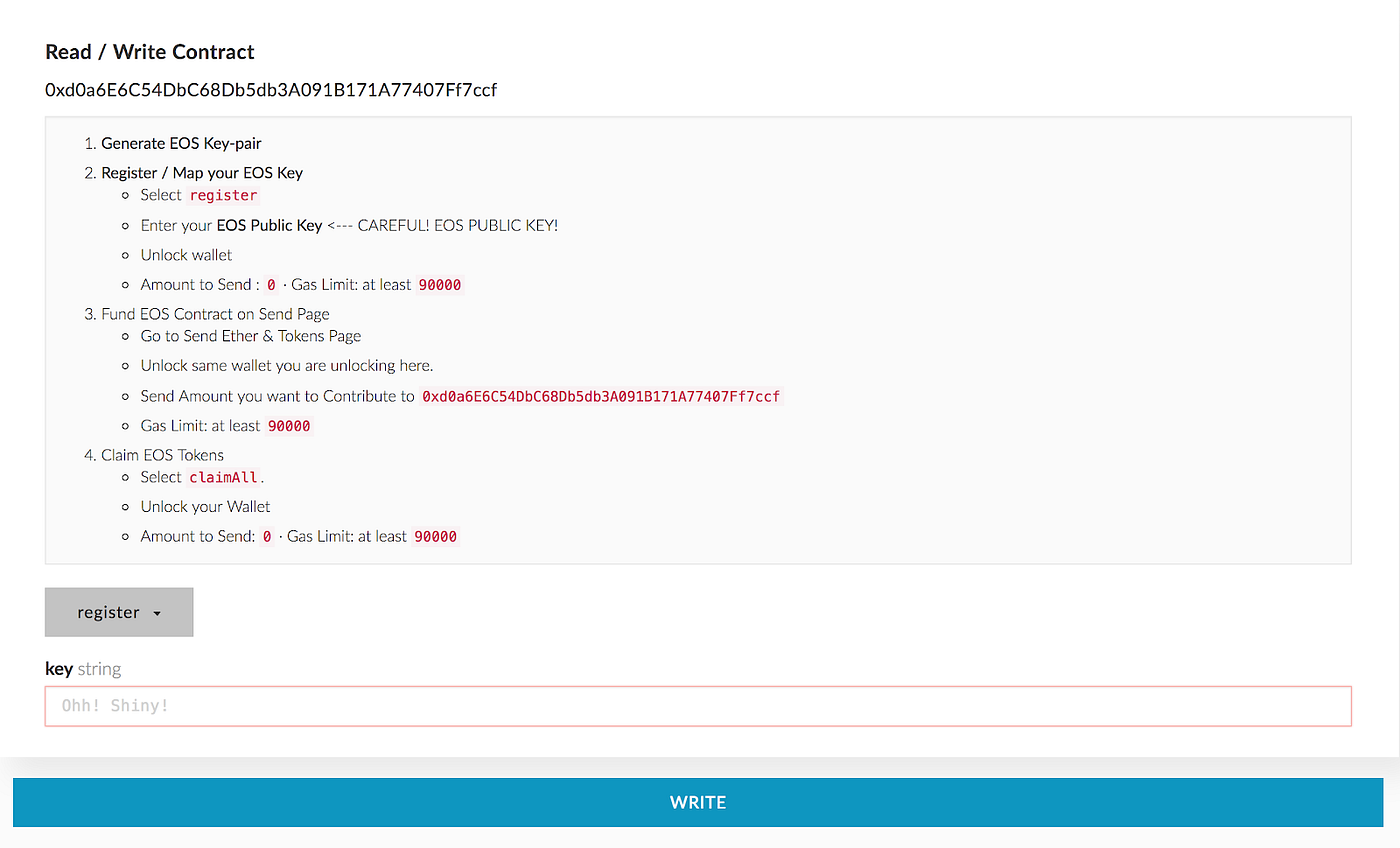
9. Select the register function
You should see following form appear below after selecting register in drop down:
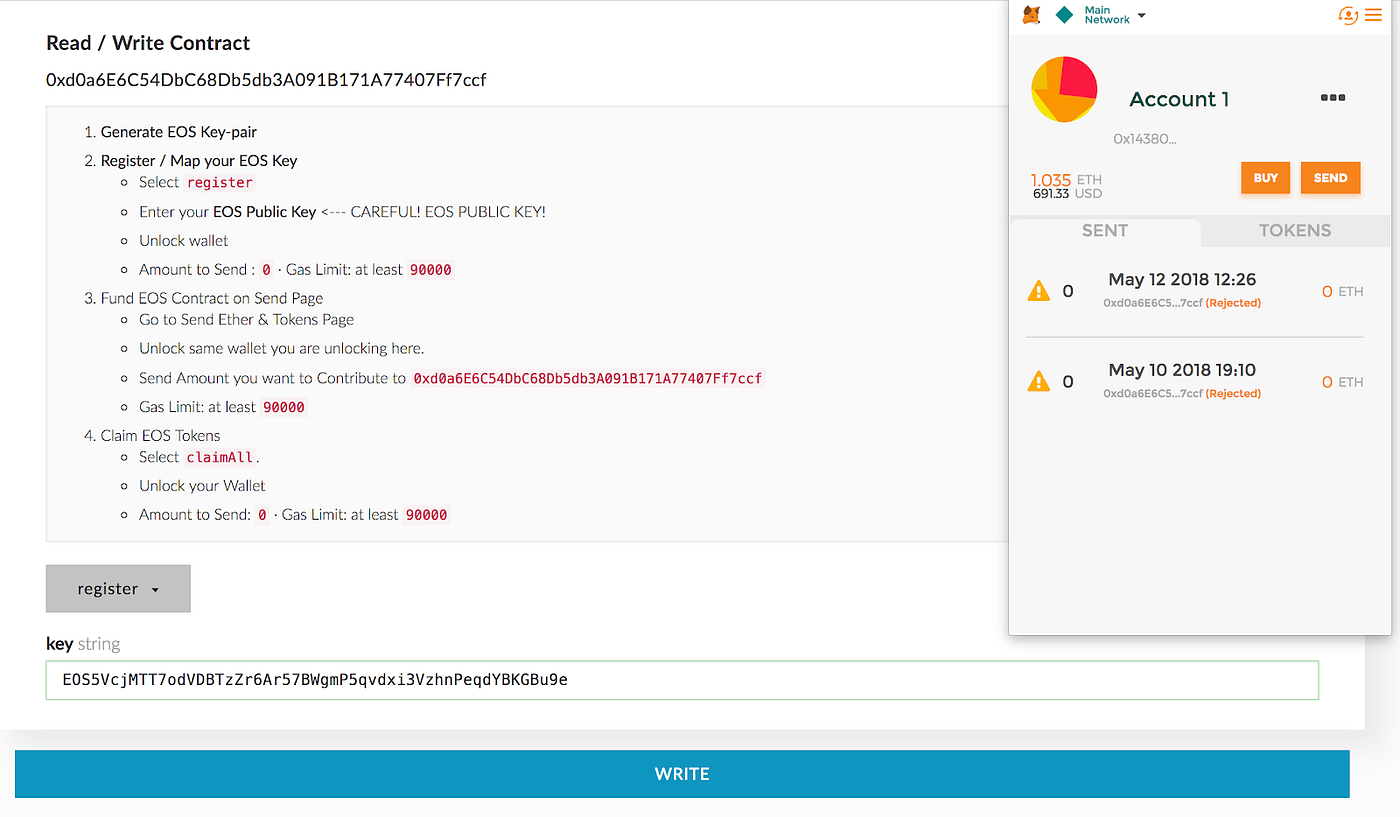
10. Associate your generated key and write the transaction to the network
Follow step #2 by unlocking your wallet and entering EOS public key you generated in step #7 and click Write button. (Make sure your have enough ETH to cover fees)
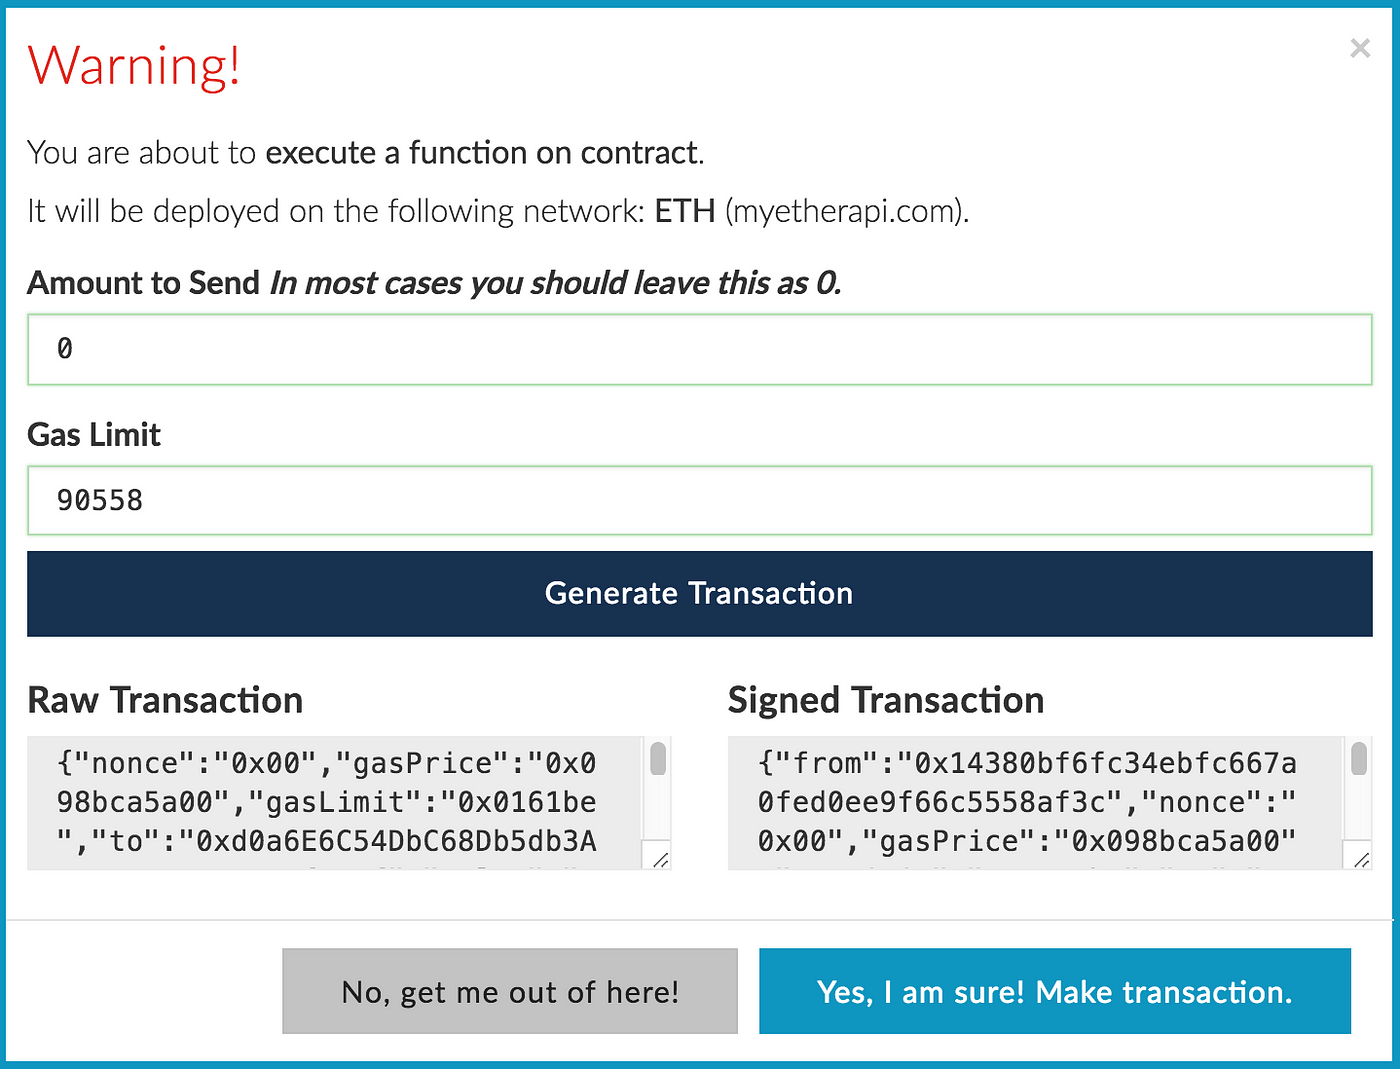
11. Confirm writing new transaction by clicking "Yes, I am sure! Make transaction"
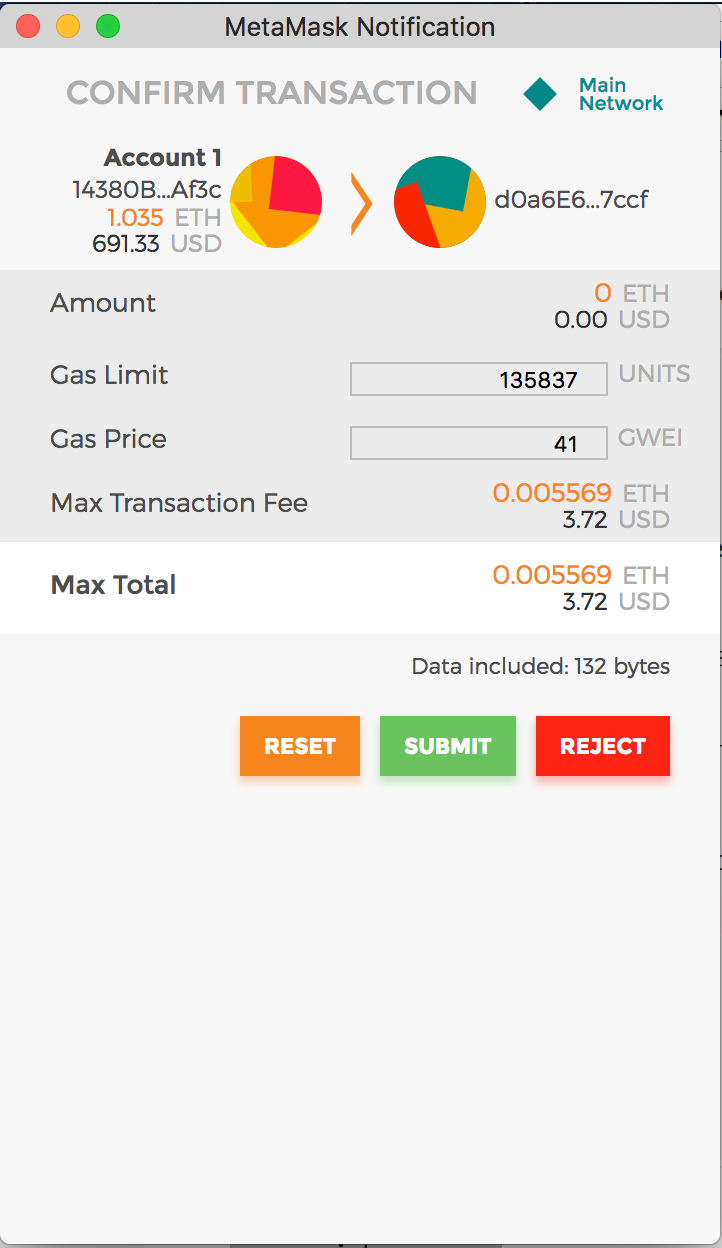
12. Submit your newly generated transaction
13. Success
At this point you successfully registered your EOS tokens and associated your Ethereum address with EOS key pair you generated. You will need to keep your EOS tokens in this wallet for the remainder of the crowdsale.

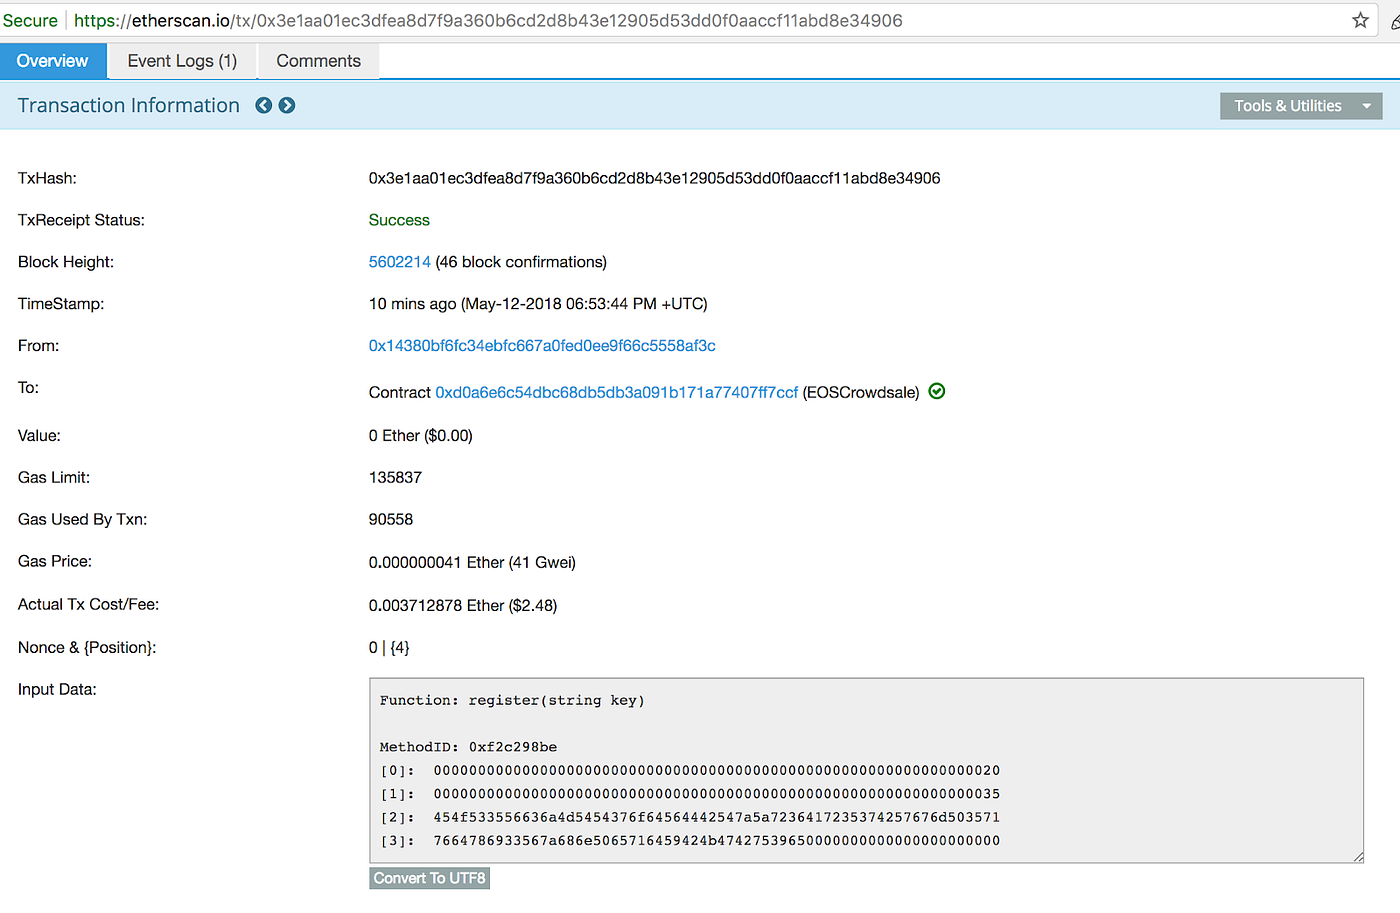
14. Verify Transaction
Click on the last transaction to see if it completed successfully
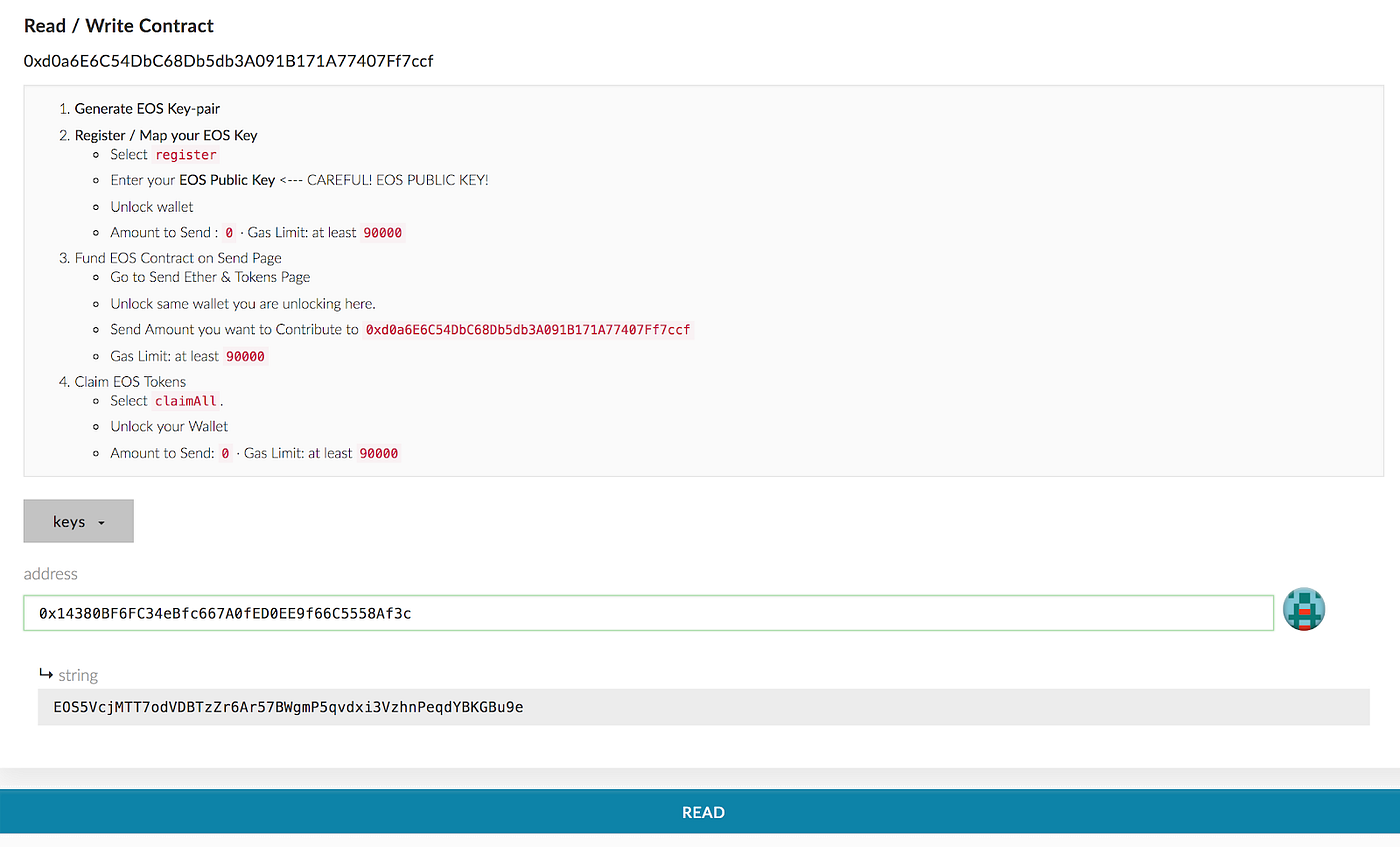
15. Verifying with the EOS Contribution contract
Finally you can verify that registration completed successfully by switching the dropdown on the EOS smart contract to "keys" and pasting your ETH address and click "READ" button. You should get your public EOS key back
Congratulations, you successfully registered your EOS tokens!
How To Register Eos Tokens
Source: https://medium.com/eostribe/how-to-register-your-eos-tokens-caf2ae62da6c
Posted by: oliveyespire.blogspot.com
0 Response to "How To Register Eos Tokens"
Post a Comment